If you are a new MAC user, you need to be able to know how to use the different accessories that might come in handy for you later on and this includes a scanner for MAC. Since this is something you need to purchase separately, not only should you know the different options that you have, you also need to look into the kinds of scanners that will be compatible with your computer. Here are some tips and techniques you might want to consider if you want to make sure that your money for purchasing a scanner will never go to waste.
10. What Scanners are Available?
As mentioned earlier, you need to make sure that the scanner you want is available already. There are some instances wherein, due to country restrictions, some more advanced scanners may still not be available in your location for purchase. If this is the case, don’t worry because you can purchase them online and you will only have to shoulder a small amount of money for shipping fee. Just like that you will have a great scanner to use.
9. Is Your Scanner Compatible?
But before anything else, you also need to check the compatibility of the scanner you are looking at. This means that some scanners may only be great for other uses and may not necessarily work for your needs. Other than this, you also need to make sure that a particular scanner that you are eyeing is actually compatible with your MAC computer. Some scanners can only be exclusive used for MAC while others are compatible for both MAC and Windows.
8. Check for Software Update
The next thing you need to look into is the software you are currently using. Ask yourself, how up to date is it? Have you recently uploaded your software or are you aware that there are newer software you can download already? A technique is to always download the newest version of any MAC software before buying your scanner because these types of accessories are intended to immediately adapt anyway. At least when you do your software will immediately become up to date and your scanner will immediately become competitive as it ought to be.
7. The Power of the USB
Most scanners for MAC can be connected to your computer through the use of a USB. This is great because it gives the scanner automatic power. The minute you turn on your computer, all you have to do is attach the USB chord to it and you’re all set to scan whatever needs scanning out there. On the one hand, if you want to save on the battery of reserve one USB slot to other more important attachments you might need, that’s also not a problem. Just remove the scanner’s connector from your MAC and attach it when needed.
6. Scanner Sharing on Home Network
Another great thing about scanner for MAC is the fact that you can share whatever it is you scanned or whatever it is that you wish to scan even when using another computer. This is of course you have already previously set up a home network for sharing. This means that if you have a number of MACs at home because your whole family is an avid user, this is to say that you can create your own home network wherein you can share files with each other without the use of a USB. All you have to do is save your documents on that single folder and everything you need to scan will be available for use.
5. What Applications are Supported?
The next tip you need to know about scanners for MAC is that it supports a number of different pre-installed applications. This includes image capture where you can automatically take a snapshot of the image you want to scan, preview where you can immediately look at the image and preview it based on how you want it to look before scanning, print and fax applications that you can use to share or print the scanned file, scanner or printer queue that gives you time to sit on whether or not you really want to scan a document and print it afterwards and some other third-party applications that will also come in very handy for you.
4. Configure the Scanner
But before getting ahead of yourself, there’s one thing you need to learn first and that is how to configure a scanner for MAC. This one depends on what kind of connection you are using at home. If you are using an Ethernet or if you are using a wireless connection, the steps for configuring a MAC scanner may differ but both processes are not that difficult at all.
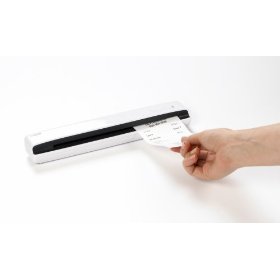
3. How to Scan
After you’re done, you need to know now how to scan an actual document. You can do this by getting a new document and scanning it or by using old documents in your computer that you wish to crop or edit and then print later on. The sizes of documents you can scan will depend on how much your actual scanner can accommodate but if you have the smaller accessory, there are some functions there that will make it possible to get bigger versions of scanned documents too.
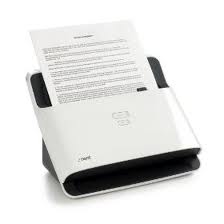
2. Document Feeder
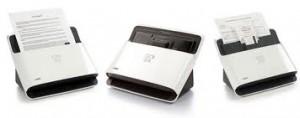
The document feeder is another feature your scanner should have. It makes loading and feeding the document into your scanner much easier than doing it on your own or manually that may take some time.
1. Save the Scanned Documents
Last step you need is to know how to save the documents you have scanned. A great suggestion is for you to categorize the folders based on their importance so you wouldn’t have any difficulty looking into each of the files. If your scanned documents have to do with work then leave it at that. On the other hand if your documents have to do with personal matters them save it in this kind of folder.
September 4, 2014 5:53 pm
Check out ExactScan Pro supporting over 400 scanners at once f.e. Avision, Brother, Canon, Fujitsu, Kodak, Oki, Pentax, Visioneer, Xerox etc or simply test it for 2 weeks